How we programmed our ESP
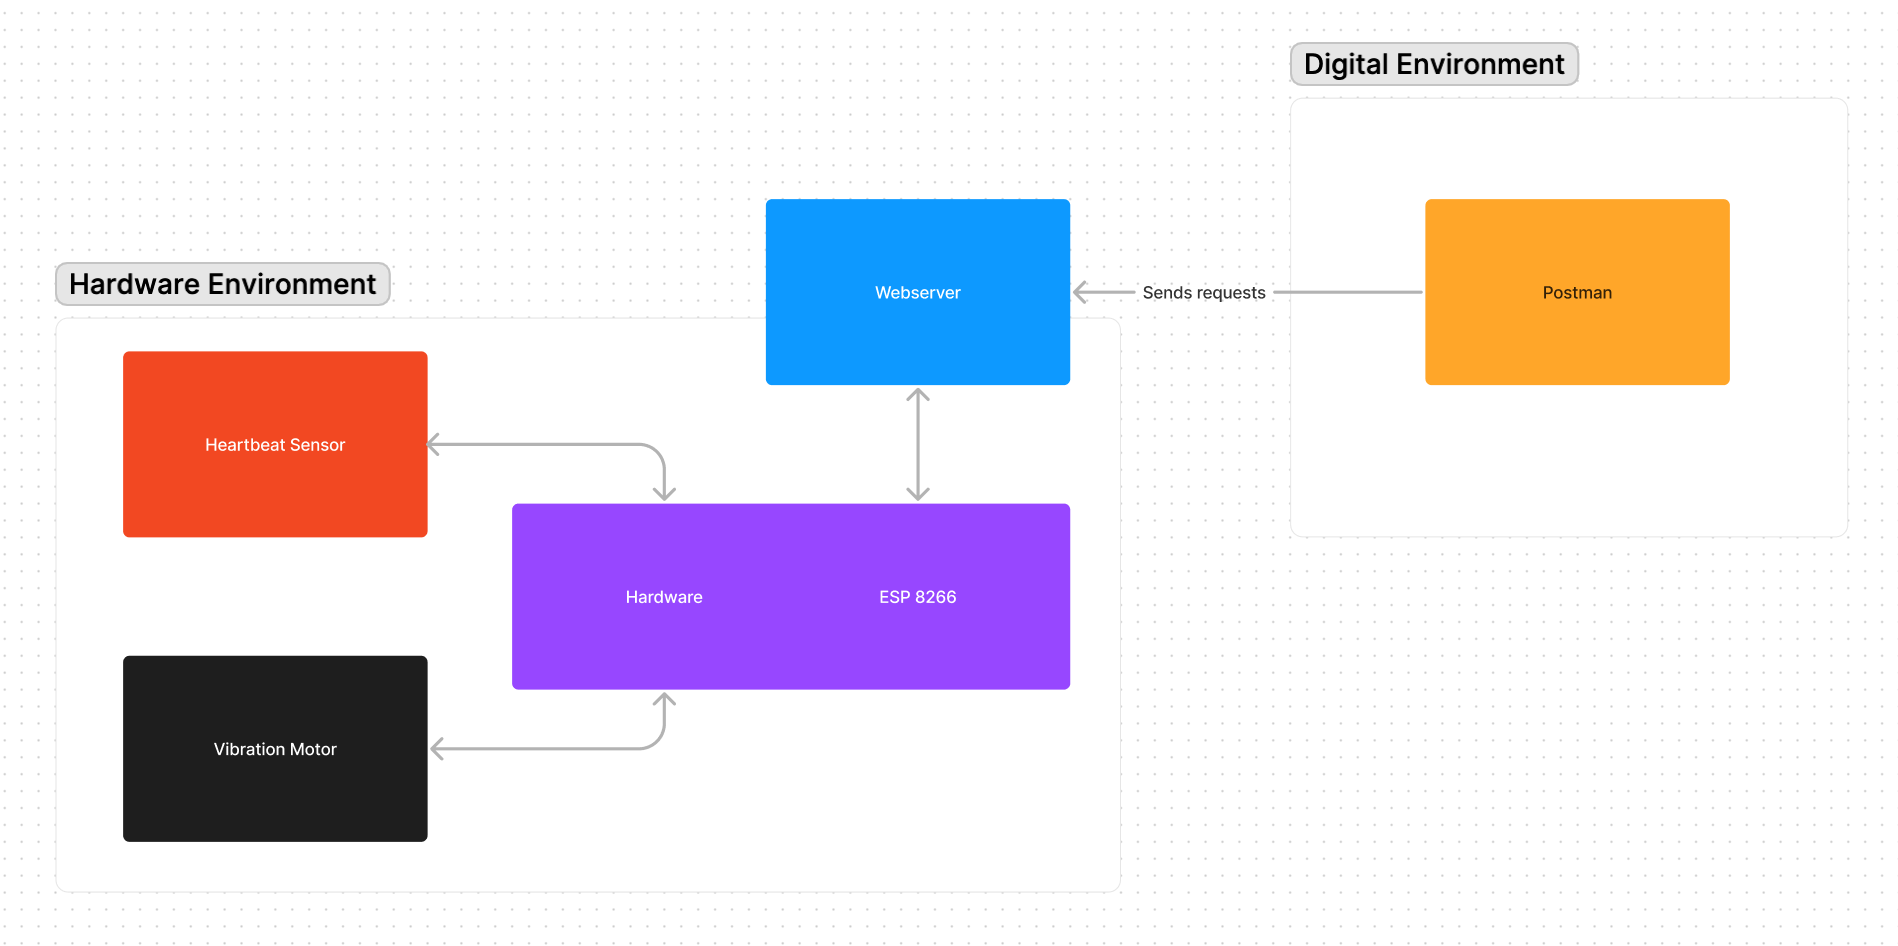
Because we have a sensor and an actuator, we need to program our ESP to do two things:
- Read the sensor
- Send the sensor data to the cloud
Then we have also to send the actuator data to the ESP.
To get started, we have read a lot of tutorials, mainly from https://randomnerdtutorials.com (opens in a new tab), which is a quite good source for ESP programming. We have also used a few libraries to not have to code everything on our own.
Here is a short explanation on how to do it:
Part 1: Presets
Connect Arduino ESP8266 with the sensors and actors to your computer and open the Arduino IDE. Start the code that you'll find in this repository under the name heartbeat_hardware.ino. You'll need to change the ssid and password variables to match your WiFi network. You'll also need to change your wlan connection to match the IP address of the server you'll be using.
Part 2: Starting the Webserver
Start the code that you have just opened. Upload it to your ESP and wait until it is finished. You should see a message in the serial monitor if you have chosen the correct baud rate. If you don't see any message, try to change the baud rate to 115200.
Part 3: Get Request
Open Postman and create a new request. You'll need a GET request to the URL http://<your IP address>/getsensor. You should now get a message back from the server which contains the sensor data as a JSON object.
Part 4: Get Request with Params
In addition to the GET request we've created before, you can set unique parameters for reading values that you otherwise don't get back. For example you can add ?motorVal=true to read not only the value of the sensor that you'll get with every GET request but also read the value of the vibration motor to see if it is turned on or off which would be very helpful in most cases.
Part 5: Post Request
Open Postman and create a new request. You'll need a POST request to the URL http://<your IP address>/setsensor. You'll need to add a body to the request. The body should be a JSON object with the following structure:
{
    "sensor": "sensor pin (4 in our case)",
    "value": "sensor value"
}